The aim of this tutorial is that you shall have a basic grasp on how to use the Demorize Editor to produce a working presentation.
This tutorial will not create any visually impressing results, but rather focus on the basic procedures that are involved in the creation of a presentation.
Before any editing can be done in the Demorize Editor we need to have a project workspace. A project workspace is the storage space on your hard drive where project files are saved. When creating a new project in the Demorize Editor a new folder is created on your hard drive which then defines the workspace for your project.
A project workspace can either be loaded into the editor if we have a previously created project, or we can start a new project. Since this is the first tutorial, we want to create a new project which is done in the menu of the editor by using the menu item.
Use the new project function now to create a new project. A file dialog will appear in which you shall select a location in you file system where you want to create the new project workspace. When you have found a good location for you new project just give it a name in the file name text box. You can give this project the name "Tutorial". A new folder will be created with the name you specify. In this folder all the project files and data will be stored. We will refer to this folder as the project workspace from now on.
What you have now is an empty project without any data that tells how the presentation shall look.
An empty presentation will not impress anyone; we need to add some graphical elements in order present something on the screen. All graphical objects are placed into layers. A presentation can consist of multiple layers that are drawn on top of each other when finally displayed on the screen, but in this tutorial we are only going to work with one layer. When you created the project in step 1, a layer was automatically created. This is the layer that is currently active for editing in the editor.
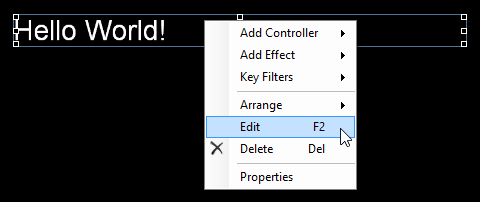
Use the ؛ menu to create a new text object. You can leave the default text "Enter text here" as it is or type something else if you want. Press the OK button to insert the text on the screen.
What happened now was that an object was placed on the Screen view, which is a preview of our layer.

You will also notice that a yellow bar was added on the timeline at the bottom of the screen.

This bar represents the text object over time. This means that the text object will be shown on the screen for the duration of this bar. You will see this later.
While we are at the timeline, we want to change the total timeline length for this layer. This is done by dragging the orange button shown on the timeline to the right. In this case we want to change the total duration of the timeline to 15 seconds.

If you now left click and drag the mouse on the timeline to change the location of the timeline cursor you will notice that the text is only visible in the Screen view when the timeline cursor is within the object's bar. For example, at time 00:00:11 the text is no longer visible on the screen.
Place the timeline cursor at 00:00:00 again.
The text object we added still only presents the default text, which is "Enter text here" if you didn't change it before. If you look at the Properties view that is shown to the right of the Screen view you will see all the text object's properties that can be changed.
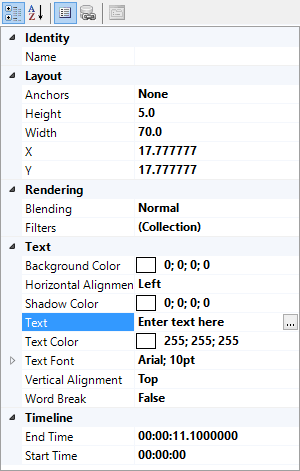
There is a property named that currently has the value "Enter text here" that you can change. The text can be edited directly in the Properties view, or by clicking on the -button that appears if you click somewhere in the Text property. Change the value of the Text property to "Hello World!".
A faster way of reaching the text edit dialog for the text object would have been to use the button in the Home menu tab, or using the option in the object's context menu in the Screen view, or using the shortcut on the keyboard. This would have directly opened the text editing dialog without having to go through the Properties view.
Its now time to save our work so it won't be lost. Use the ؛ menu, which will save the entire project to the project workspace on your hard drive.
Even though we are not creating any visually impressing scene right now, an animation always makes it look a little bit better. We are going to add some movement to our "Hello World!" text in this step.
All animation is performed on the timeline. We are now going to add animations to the text object's position by adding some predefined effects to the object. Right-click on the yellow bar on the timeline, which represents the text object. In the context menu select ؛ ؛ .
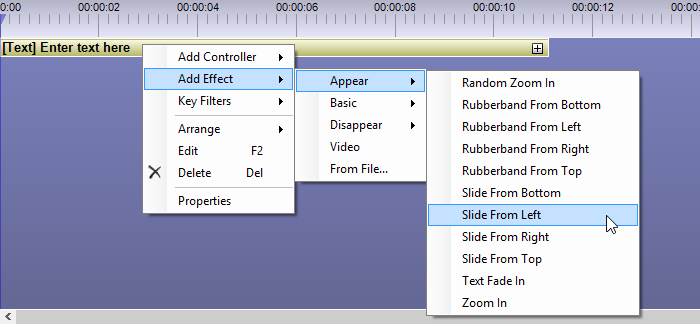
The effect is not visible in the Timeline view by default so you have to click on the + sign on the timeline object to see the new effect.

Again, save you work with the ؛ menu in case you would like to continue at a later time.
You might have noticed that the text disappeared from the Screen view in the last step if you clicked on the timeline bar. This is because we added an animation that over time will move the text from a position outside the screen to the position where it was previously located on the screen. Since the timeline cursor is placed at 00:00:00 on the timeline, the text is now placed outside to the left of the screen.
We now want to play a preview of our scene layer to see how it looks when it is animated. This preview is displayed in the Screen view in the editor just as when you manually moved the timeline cursor before. The difference with the playback preview is that it advances the time forward in real clock time. In the menu you can start and stop the preview playback with the and functions. You can also play and pause the playback with the buttons on the left side of the timeline view.
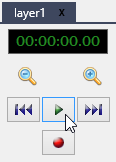
Press the Play button and watch the text slowly appear on the screen between time 00:00:00 and 00:00:10. At time 00:00:10 it will disappear from the screen because, as we said earlier, the object is only defined to be shown on the screen during the first ten seconds by the timeline.
Stop the preview playback before proceeding with this tutorial.
You now have a scene layer that can be used in a presentation. A complete presentation is more than just layers though. A layer must be put in a Scene, which in turn must be put into a Stream before it is considered to be part of any presentation. When you create a new project this chain is already setup. When your presentation grows and you add more layers and more scenes to your project, you need to handle this by yourself. In this part of the tutorial we will therefore have a look at the setup that has been created for you during project creation.
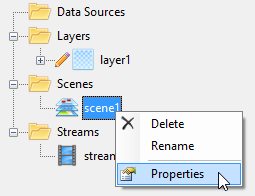
First, lets have a look at the Scene that is using our layer. In the Scenes category in the Project view, select for the scene from its context menu.
If you take a look at the Scene Composition you will see that our layer is already added to the list.
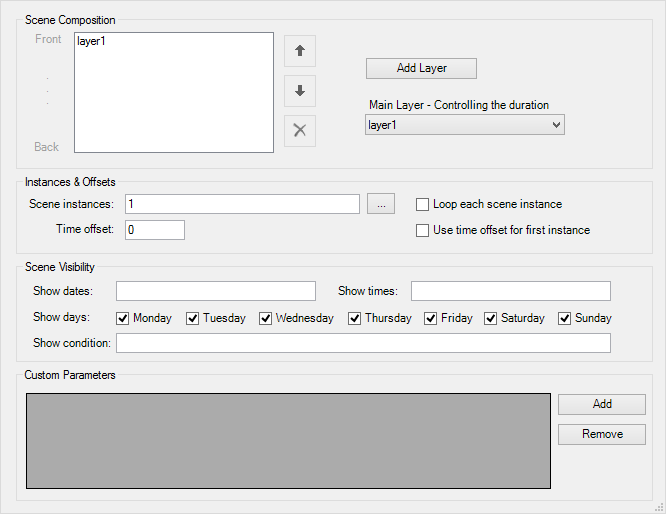
The button is used when you want to add more layers to the composition. A scene can show several layers at once on top of each other. In this tutorial we will only use one layer so now close the scene dialog.
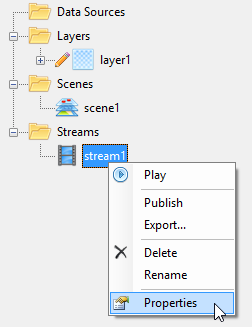
The next step is to have a look at the stream that uses our scenes. Open the properties for the stream in the Streams category of the Project view.
You now see a list of scenes that will be presented after each other in the final presentation.
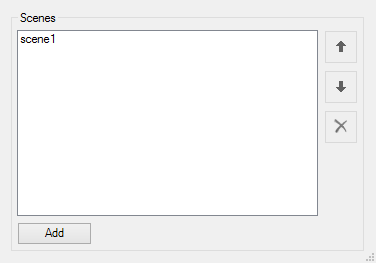
In our case there is only one scene added to the list, i.e the scene that was created for us when we created the project. Close the stream dialog.
The final step in this tutorial is going to display the presentation in full screen using the Demorize Player software. This is the actual software that is run on client computers, so we are now going to see how our final presentation looks.
You play the stream using the Demorize Player software by launching it with the button in the application Player tab, or with the option in the stream's context menu in the Project view.

Before you launch the Demorize Player, keep in mind that you exit the Demorize Player by pressing the Escape key on your keyboard.
Now, the final moment is here. Launch the Demorize Player and wait for the presentation to start. The screen will show some progress information for a little while while the stream is loading. Then, you will see the "Hello World!" text slide in from the left for ten seconds. Then, the screen will be black for five seconds, as you saw earlier on the timeline for the scene layer. The scene will then repeat and the text will come sliding in from the left again.
Congratulations! You are now ready to jump to the next tutorial in Chapter 11, Tutorial 2: Controlling animation and background image, which will teach you how to control the animation in more detail and how to use multiple layers.